Paneer Milk Calculator
Based on the standard ratio from the article: 1 liter of milk yields approximately 200 grams of paneer. This calculator helps you determine how much milk you need or how much paneer you can make.
Result
Enter a milk amount to see your paneer yield.
Understanding Your Results
Important note: The standard yield is 200 grams of paneer per liter of milk. However, actual yield can vary based on:
- Quality and fat content of milk (higher fat = more paneer)
- Amount of acid used in curdling
- Pressing time and pressure
Ever made paneer at home and ended up with way less than you expected? You’re not alone. Most people assume a liter of milk gives you a big block of soft, squishy paneer - but reality hits hard when you see just a handful of curds in the strainer. So how much milk do you really need to make paneer? The answer isn’t magic. It’s science - and a little bit of kitchen math.
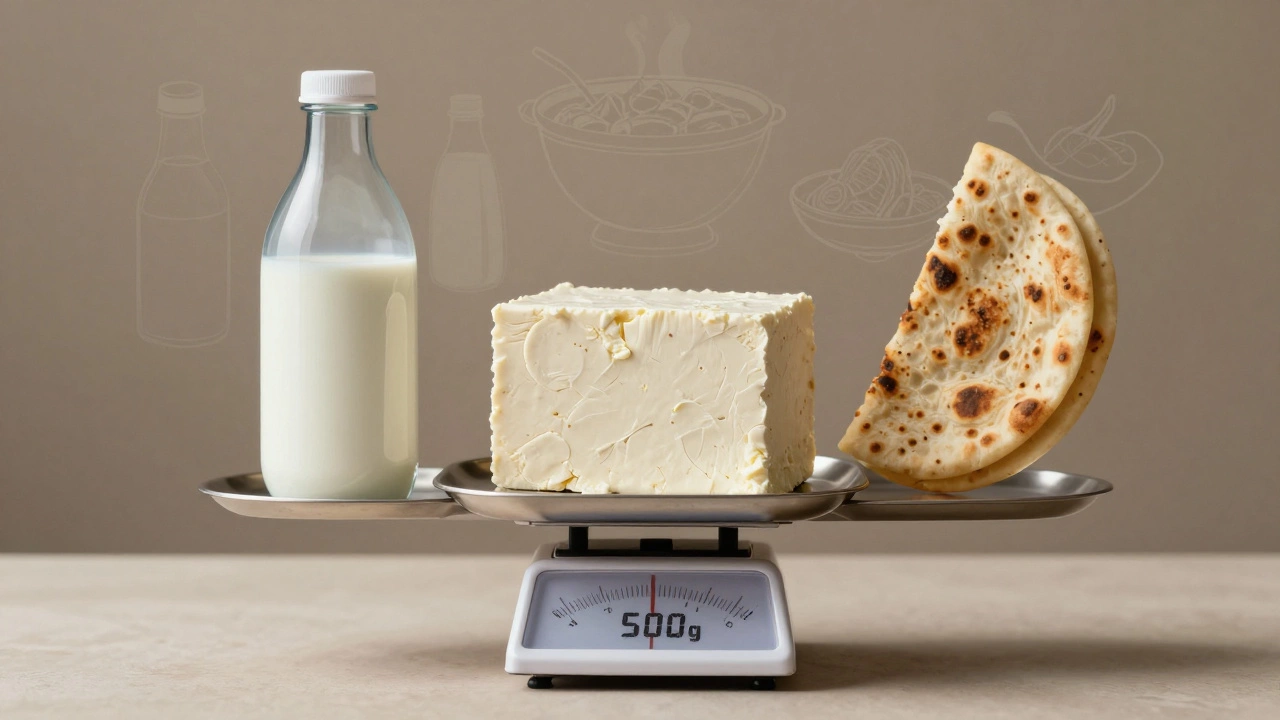
Basic Rule: 1 Liter of Milk = About 200 Grams of Paneer
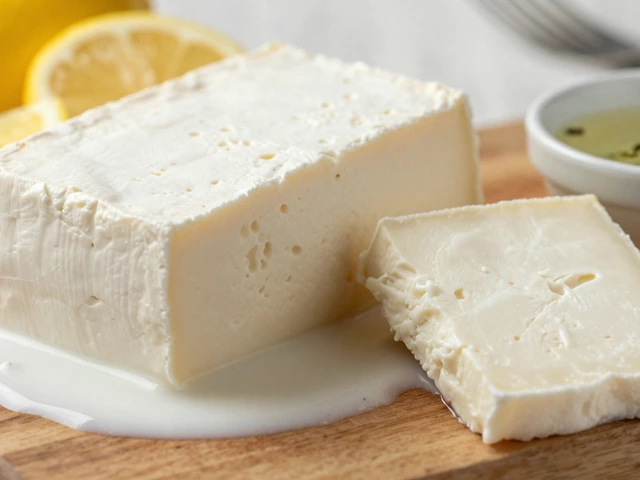
If you’re starting with 1 liter (1000 ml) of whole milk, you’ll get roughly 200 grams of paneer after draining and pressing. That’s about the size of a small deck of cards. It sounds small, but it’s normal. Why? Because paneer is almost entirely protein and fat. The rest - water, lactose, minerals - drains away as whey. You’re not losing volume; you’re concentrating what matters.
For example, if you want to make 400 grams of paneer (enough for a large paneer tikka masala), you’ll need 2 liters of milk. No shortcuts. No tricks. Just two full cartons.
Why Does Milk Matter?
Not all milk works the same. Whole milk with at least 3.5% fat gives you the best yield and texture. Skim milk? You’ll get maybe 100 grams per liter - and it’ll be dry, crumbly, and taste like nothing. Low-fat milk? Same issue. The fat is what holds the curds together. It’s the glue.
Homogenized milk? Fine. Pasteurized? Perfect. Raw milk? Also fine - but make sure it’s fresh and clean. Ultra-pasteurized milk? Skip it. The high heat changes the protein structure, and the curds won’t form properly. You’ll end up with a watery mess.
Store-bought milk labeled "full cream" in India? That’s usually around 4.5% fat. That’s even better. You might get 220-240 grams per liter. But don’t assume it’s always consistent. Brands vary. Stick to trusted ones.
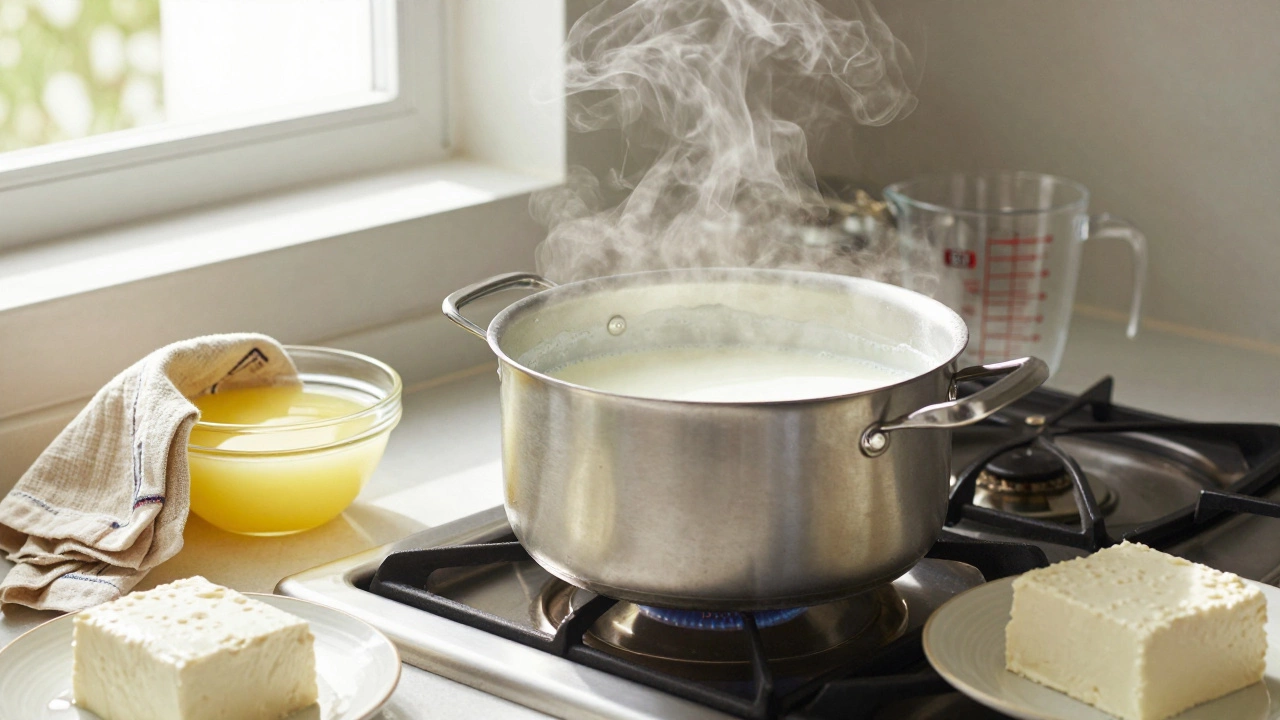
Step-by-Step: How Milk Turns Into Paneer
Here’s what actually happens when you make paneer:
- You heat 1 liter of milk slowly until it’s just below boiling - about 85°C. Don’t let it boil over.
- You add acid - lemon juice, vinegar, or yogurt. About 2-3 tablespoons for 1 liter. Stir gently.
- The milk separates. Solid curds form. Liquid whey drops out.
- You strain the curds through a muslin cloth.
- You press the curds under a heavy weight - like a cast-iron pan or a stack of books - for 30-45 minutes.
That’s it. No rennet. No fancy equipment. Just heat, acid, and pressure.

What Affects the Yield?
Three things change how much paneer you get:
- Milk fat content - Higher fat = more yield. Full cream milk gives 20-25% more than skim.
- Acid amount - Too little? Curds won’t fully separate. Too much? Paneer turns sour and grainy. Stick to 2-3 tbsp per liter.
- Pressing time and weight - Press longer and heavier, and you get a firmer, denser block. But you also squeeze out more moisture - which reduces volume slightly. Don’t overdo it.
Here’s a real-world test: Two people used 1 liter of milk each. One used Amul full cream (4.8% fat), the other used a generic brand (3.2% fat). The Amul batch gave 230 grams. The generic? 180 grams. That’s a 28% difference from fat alone.
How to Get More Paneer Without Buying More Milk
You can’t magically turn water into cheese. But you can optimize:
- Use milk that’s been refrigerated for less than 48 hours. Fresh milk curdles better.
- Don’t rush the heating. Slow heat = smoother curds.
- Let the curds sit in the strainer for 10 minutes before pressing. This lets more whey drain naturally.
- Use a double-layered muslin cloth. Single layers tear. Double layers hold shape.
- Press with something flat and heavy - a cast-iron skillet works better than a bowl of cans.
And skip the microwave trick. Some blogs say microwaving the curds speeds things up. It doesn’t. It just melts the fat and ruins texture.
What Happens to the Whey?
Don’t throw it out. That clear, slightly yellow liquid is packed with protein, calcium, and lactose. It’s like liquid nutrition.
- Use it to knead roti dough - adds softness and nutrition.
- Replace water in dal or soup - gives a subtle creaminess.
- Blend it into smoothies - adds protein without dairy taste.
- Water your plants - it’s a mild organic fertilizer.
One cup of whey from 1 liter of milk has about 6 grams of protein. That’s almost like an egg. Waste it? You’re throwing away free nutrition.
Common Mistakes That Waste Milk
Here’s what goes wrong - and how to fix it:
- Milk boils too fast → Curds form too quickly, trapping whey. Slow heat is key.
- Adding too much lemon juice → Paneer tastes sour and crumbly. Stick to 2 tbsp per liter.
- Not pressing enough → Paneer stays soft and falls apart in cooking. Press for at least 30 minutes.
- Using ultra-pasteurized milk → No curds form. Always check the label.
- Using cold milk → Cold milk takes longer to curdle. Warm it to room temp first.
How Much Paneer Do You Actually Need?
Here’s a quick cheat sheet for common recipes:
| Recipe | Paneer Needed | Milk Required |
|---|---|---|
| Paneer Tikka (4 servings) | 150 grams | 750 ml |
| Palak Paneer (4 servings) | 200 grams | 1 liter |
| Paneer Butter Masala (4 servings) | 250 grams | 1.25 liters |
| Paneer Pasanda (4 servings) | 300 grams | 1.5 liters |
| Paneer Paratha (2 parathas) | 100 grams | 500 ml |
Most home cooks make too much paneer at once - and it goes bad. Paneer lasts 3-4 days in the fridge. Freeze it if you’re not using it soon. It keeps for 2 months.
Final Answer: How Much Milk Do You Need?
For every 100 grams of paneer, you need 500 ml of whole milk. It’s that simple.
Need 100 grams? Use half a liter.
Need 500 grams? Use 2.5 liters.
Need 1 kilogram? You’re looking at 5 liters - and a big pot.
Most people make paneer once a week. So keep it simple: Buy 1 liter of full cream milk, make 200 grams of paneer, and use it all in a week. No waste. No guesswork. Just good, fresh paneer.
Can I use powdered milk to make paneer?
No. Powdered milk lacks the natural fat and protein structure needed for proper curd formation. Even if you reconstitute it with water, the texture will be grainy and the yield will be very low - maybe 50 grams per liter. Stick to fresh liquid milk.
Why does my paneer crumble when I fry it?
It’s usually because you didn’t press it long enough or used low-fat milk. Press for at least 30-45 minutes under a heavy weight. Also, make sure your milk had at least 3.5% fat. If the paneer is too soft or crumbly, it won’t hold shape under heat.
Can I make paneer from goat or almond milk?
Goat milk? Yes - it works, but the flavor is stronger and the yield is slightly lower. Almond milk? No. Plant milks don’t contain casein protein, which is what forms paneer. You’ll get a mushy sludge, not cheese.
How long does homemade paneer last?
In the fridge, it lasts 3-4 days if stored in water. Change the water daily to keep it fresh. For longer storage, freeze it in an airtight container. It’ll last 2 months. Thaw in the fridge overnight before using.
Is homemade paneer better than store-bought?
Yes - if you use good milk. Store-bought paneer often has additives like citric acid or preservatives. Homemade is pure, soft, and tastes richer. Plus, you control the fat content and freshness. It’s worth the extra 20 minutes of effort.