Roti Softness Calculator
Answer these questions about your process to find out your 'Softness Score' and get specific fixes.
Your Analysis
Recommended Fixes
There is nothing worse than biting into a roti that feels like chewing on leather. You spent twenty minutes kneading the dough, rolling it out with care, and watching those beautiful bubbles puff up on the tawa. It looks perfect. But ten minutes later, when you pick it up to eat, it’s dry, stiff, and practically shatters. Why does this happen? And more importantly, how do you stop it from ruining your dinner?
The short answer is moisture loss and gluten over-development. But the long answer involves flour quality, water temperature, resting time, and heat management. If you’ve ever wondered why your grandmother’s rotis stay soft for hours while yours turn into crackers by bedtime, you are not alone. This is one of the most common kitchen frustrations in Indian households worldwide.
Quick Summary: Why Roti Gets Hard
- Flour Quality: Low-protein whole wheat flour (Atta) creates softer rotis than high-protein bread flour.
- Kneading Too Much: Over-kneading develops tough gluten strands that make the bread chewy and hard.
- Dry Dough: Using too little water or cold water prevents proper hydration and elasticity.
- No Resting Time: Skipping the rest period leaves gluten tight and dough difficult to roll without tearing.
- Cooling Method: Leaving rotis exposed to air causes rapid moisture evaporation; storing them wrapped keeps them soft.
The Role of Flour: Not All Wheat Is Created Equal
The journey to a soft roti starts before you even touch the water. The type of flour you use dictates the texture of the final product. In India, we use Atta, which is whole wheat flour specifically milled for flatbreads. Atta has a moderate protein content, usually between 10% and 12%. This is the sweet spot. It provides enough structure to hold the roti together but not so much that it becomes tough.
If you live outside India, you might be tempted to use generic "whole wheat flour" from a Western supermarket. Here is the catch: many Western whole wheat flours are milled differently. They often have a higher bran-to-endosperm ratio or are mixed with harder wheat varieties meant for bread making. These flours can result in dense, hard rotis because they absorb water differently and develop stronger gluten networks.
To fix this, look for flour labeled as "soft wheat" or "chapati flour." If you only have regular whole wheat flour, try mixing it with a tablespoon of rice flour or cornstarch. These starches dilute the gluten content, resulting in a more tender crumb. Think of it like adding sand to concrete-it weakens the structure just enough to make it less rigid.
The Kneading Trap: Less Is More
Most people think that kneading dough longer makes it better. For pizza or baguettes, that is true. For roti, it is a mistake. When you knead dough, you align gluten proteins into long, elastic chains. A little alignment is good; it gives the roti stretchiness. Too much alignment makes the roti rubbery and hard.
Here is a simple rule: knead until the dough is smooth and no longer sticks to your hands. That usually takes about five to seven minutes. Once it reaches that stage, stop. Do not keep working it to "perfect" it. Over-kneaded dough will feel tight and spring back aggressively when you try to roll it. Under-kneaded dough will tear easily. You want a happy medium-smooth, pliable, and slightly tacky.
A pro tip from my own kitchen in Brighton: add a teaspoon of oil or ghee to the dough while kneading. Fat coats the gluten strands, preventing them from bonding too tightly. This is known as "shortening" the gluten. It’s the same reason pie crusts are flaky instead of chewy. The fat creates barriers within the dough matrix, ensuring a softer bite.
Water Temperature Matters More Than You Think
I used to use ice-cold water from the tap, thinking it would keep the dough cool and easy to handle. I was wrong. Cold water slows down the hydration process. The flour particles take longer to absorb the liquid, leading to a stiffer dough that requires more force to roll. That extra force translates to more gluten development, which leads to hardness.
Use warm water. Not hot-just comfortably warm, like bathwater. Warm water helps the starches in the flour gelatinize slightly during the initial mix. This traps moisture inside the dough structure. When the roti hits the hot tawa, that trapped steam expands, creating those lovely puffs. More steam means more internal moisture, which keeps the roti soft even after it cools.
If your kitchen is very cold, like mine often is in the British winter, consider warming the bowl before adding ingredients. Even a small increase in ambient temperature can improve dough elasticity significantly.

The Critical Importance of Resting
This is the step most home cooks skip because they are hungry or in a rush. Cover your dough ball with a damp cloth or plastic wrap and let it rest for at least 15 to 20 minutes. Why? Because gluten is elastic. When you knead it, you stretch it out. If you try to roll it immediately, it fights back. It shrinks, tears, and resists your rolling pin.
Resting allows the gluten network to relax. Imagine stretching a rubber band and then letting it sit. It loses some of its tension. During this rest, the flour fully hydrates, and the starches swell. The dough becomes easier to roll thin without applying excessive pressure. Thin rotis cook faster and retain more moisture than thick ones. Thick rotis require longer cooking times, which drives out more water, leaving you with a dry, hard disc.
If you are truly short on time, microwave the covered dough for 10 seconds. The gentle heat speeds up the relaxation process. It’s a hack, but it works in a pinch.
Cooking Technique: Heat and Timing
Even with perfect dough, bad cooking technique will ruin your roti. The tawa (griddle) needs to be hot, but not smoking. If it’s too cool, the roti steams rather than sears, becoming soggy and then drying out unevenly. If it’s too hot, the outside burns before the inside cooks, trapping raw flour that hardens as it sits.
Here is the ideal sequence:
- Roll the roti evenly. Avoid pressing too hard with the rolling pin, as this compresses the layers and removes air pockets.
- Place the roti on the preheated tawa. Cook for about 30-45 seconds until spots appear.
- Flip it. Press gently with a spatula, especially around the edges, to encourage puffing.
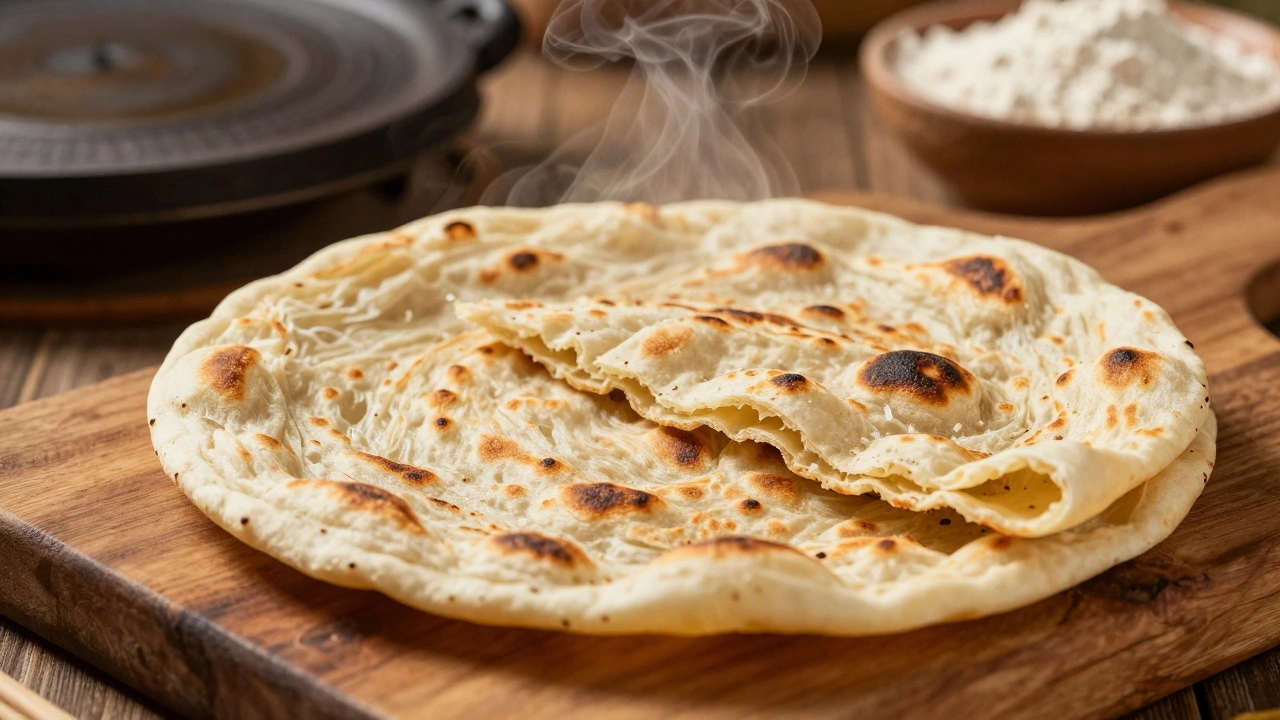
- For the best results, transfer the roti directly to an open flame for 5-10 seconds. The direct heat forces the remaining moisture to expand rapidly, puffing the roti like a balloon. This step is crucial for softness because it ensures the entire interior is cooked through by steam, not just dried out by conduction.
Do not overcook. Once the roti is browned and puffed, it is done. Leaving it on the tawa for another minute to "crisp it up" is a recipe for disaster. That extra minute evaporates the last bits of moisture, turning your roti into a chip.
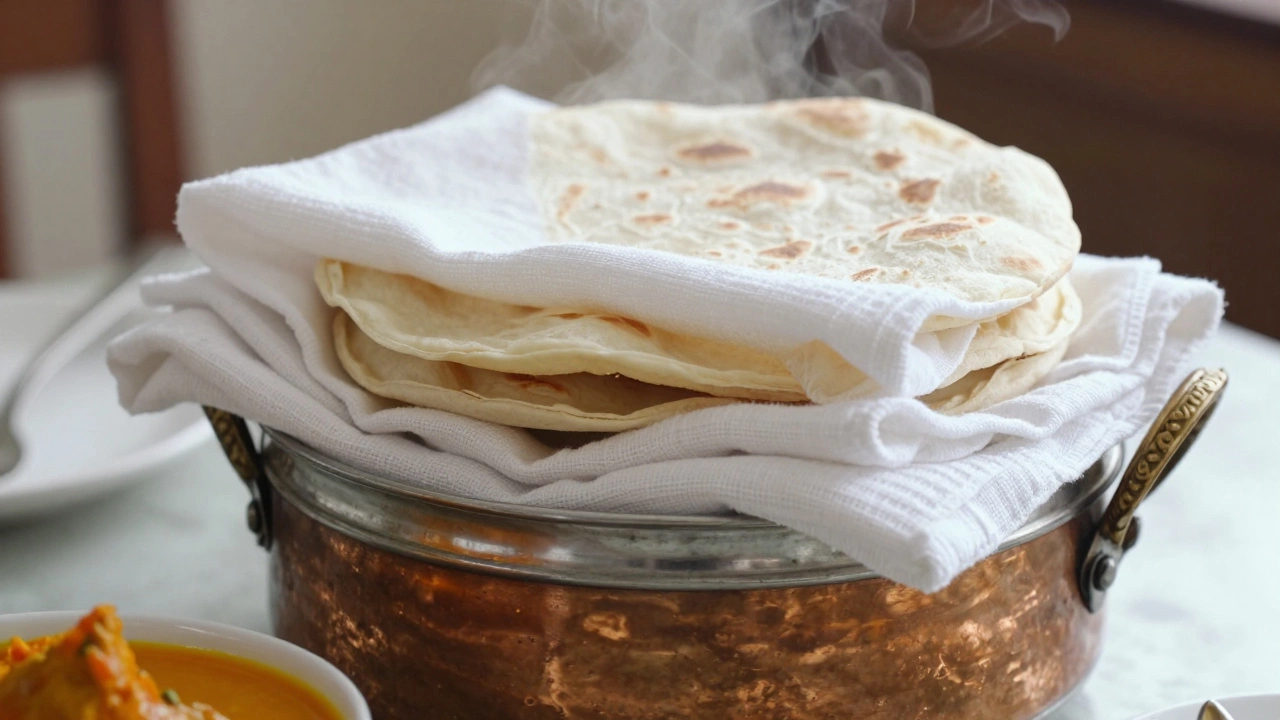
Storage: How to Keep Roti Soft for Hours
You’ve made perfect rotis. Now you need to keep them soft while the curry finishes simmering. The enemy here is air exposure. As soon as a roti cools, condensation forms on its surface. If left uncovered, that moisture evaporates, taking flavor and tenderness with it.
The traditional method is to stack the hot rotis in a clean, dry cotton cloth or a dedicated roti dabba (container). The cloth wicks away excess steam while keeping the environment humid. This prevents the surface from drying out. Never use plastic bags while the rotis are still steaming hot. Plastic traps all the moisture, making the rotis soggy and slimy. Wait until they are warm, not piping hot, before sealing them in an airtight container if you must use plastic.
If you are serving guests, keep the stack under a warm plate or in a low oven (turned off but residual heat remains). This maintains the temperature above the point where starch retrogradation occurs-a fancy way of saying it stops the starch molecules from recrystallizing and turning hard.
Troubleshooting Common Issues
| Problem | Likely Cause | Solution |
|---|---|---|
| Roti tears when rolling | Dough too dry or not rested | Add a few drops of water; rest dough longer. |
| Roti shrinks back | Gluten too tight (over-kneaded) | Knead less next time; add oil to dough. |
| Roti is hard after cooling | Overcooked or stored improperly | |
| Raw patches inside | Tawa too cool or rolled too thick | |
| Bitter taste | Burnt due to high heat |
Another issue specific to living in humid climates like Brighton is condensation buildup. If your kitchen is steamy from boiling potatoes or washing dishes, the extra humidity can make the dough sticky. Adjust by using slightly less water, but don’t compensate by over-kneading. Instead, dust generously with dry flour while rolling.
Advanced Tips for Ultra-Soft Rotis
If you want to elevate your game, consider these additions:
- Yogurt: Add a tablespoon of plain yogurt to the dough. The lactic acid tenderizes the gluten and adds a subtle tang.
- Milk: Replace half the water with milk. The lactose and fats contribute to browning and softness.
- Spices: Mix roasted cumin powder or ajwain (carom seeds) into the flour. These spices aid digestion and add flavor without affecting texture negatively.
Remember, consistency is key. Make a batch today, note what worked, and adjust tomorrow. Cooking is an experiment, and your palate is the judge. With these adjustments, your rotis should stay soft, pliable, and delicious from the first bite to the last.
Can I use bread flour for roti?
You can, but it’s not ideal. Bread flour has high protein (12-14%), which creates strong gluten. This makes rotis chewy and hard. If you must use it, mix it 50/50 with all-purpose flour or add a tablespoon of cornstarch to reduce toughness.
Why does my roti become hard overnight?
Starch retrogradation causes this. As cooled bread sits, starch molecules realign into crystalline structures, squeezing out water. To prevent this, store rotis in an airtight container with a slice of fresh bread or apple to maintain humidity, or reheat them briefly on a hot tawa with a sprinkle of water.
Should I add oil to the dough?
Yes, a small amount (1 tsp per cup of flour) helps soften the gluten. However, too much oil can make the roti greasy and inhibit puffing. Use ghee or neutral oil like sunflower or canola.
How do I revive hardened rotis?
Sprinkle a few drops of water on the hardened roti and place it on a hot tawa for 10-15 seconds per side. The steam generated will rehydrate the starches and restore flexibility. Alternatively, wrap in a damp paper towel and microwave for 15-20 seconds.
Does altitude affect roti making?
Yes. At higher altitudes, lower atmospheric pressure affects boiling points and gas expansion. You may need slightly more water in the dough and reduced cooking time. In sea-level cities like Brighton, standard recipes work well, but travelers moving to hill stations should adjust accordingly.